
AWS Essentials for Data Science3. Compute
#aws
#python
Written by Matt Sosna on December 31, 2022
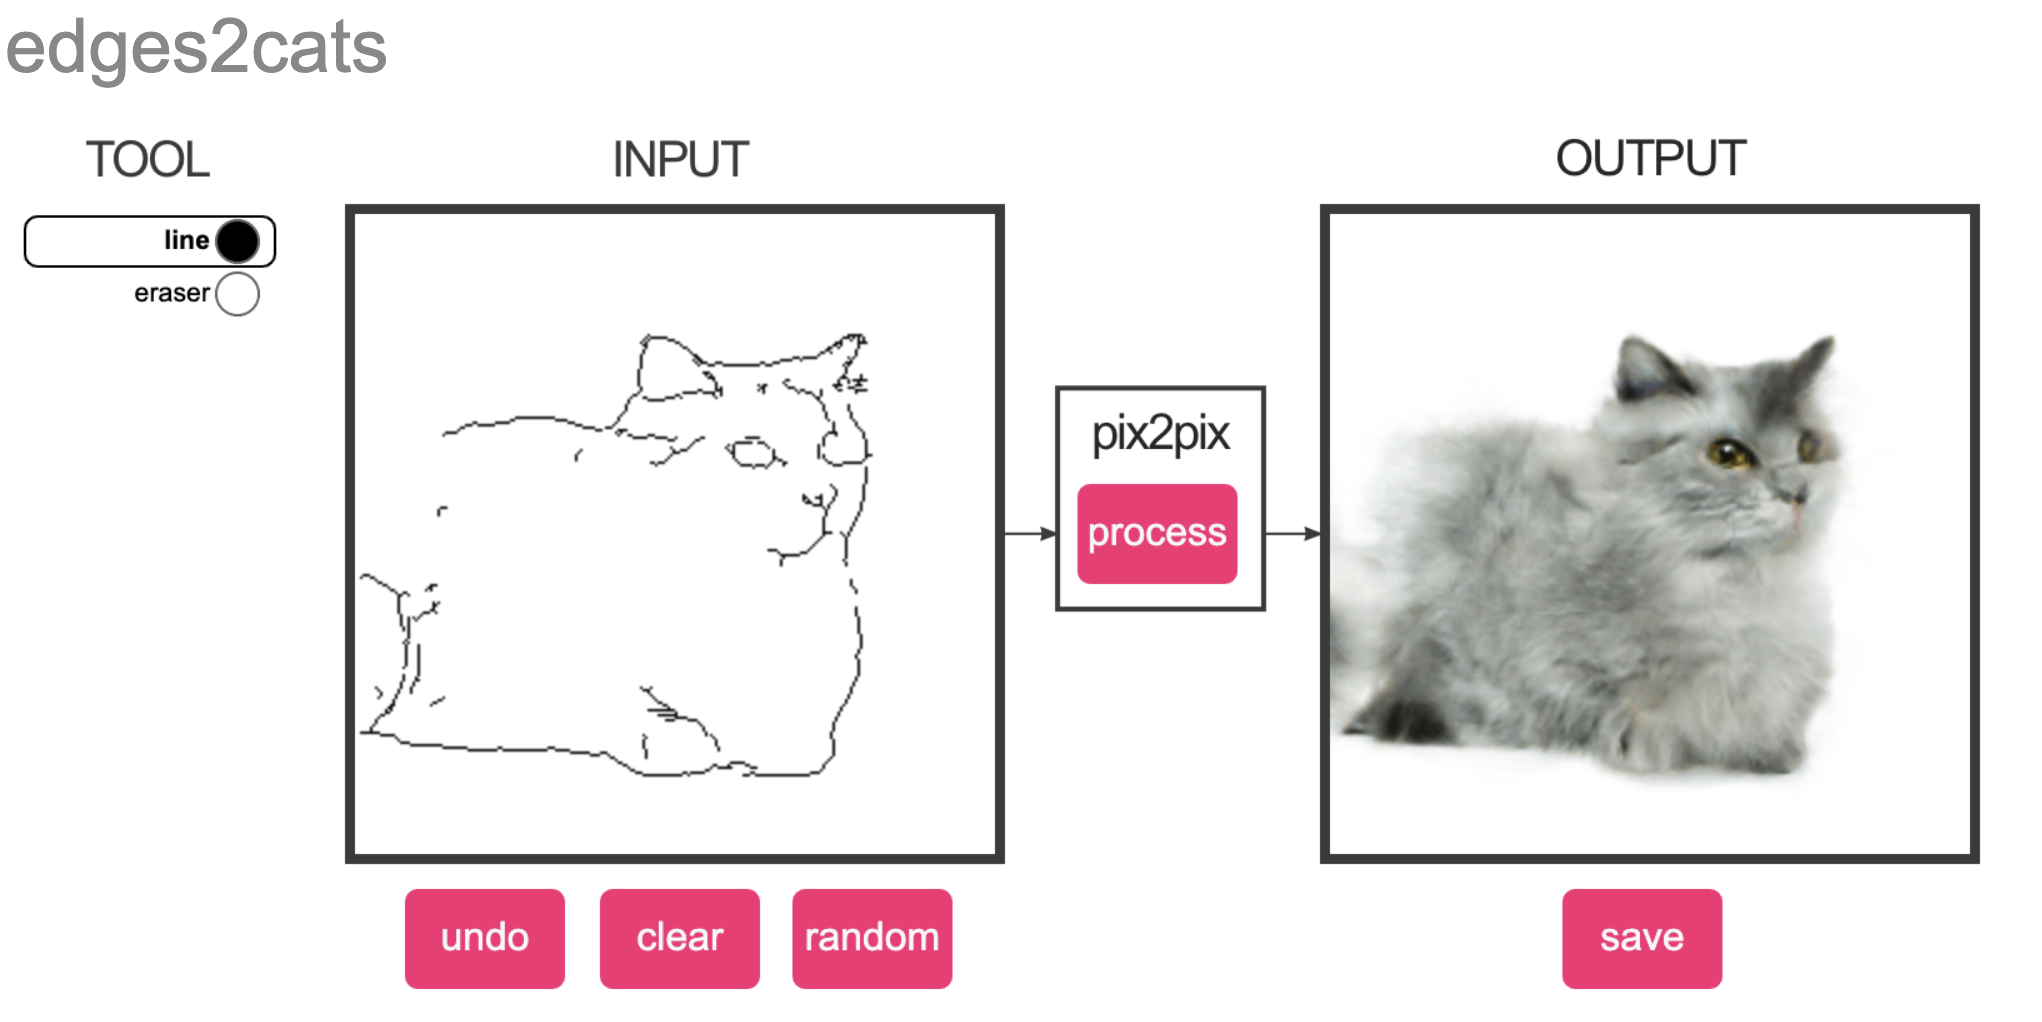 Screenshot from Christopher Hesse’s amazing Image-to-Image Demo
So you’ve built a cool app and want to show it off to the world. Maybe it’s an AI that generates cat pictures from scribbles, a viral LinkedIn post generator, or an English to RegEx translator. You want a user to just click a link and immediately start interacting with your app, rather than needing to download and run it on their computer.
This “immediate interactivity” is going to require a server, which takes user requests (e.g., cat scribbles) and serves responses (e.g., AI-generated cat images). You could use your personal laptop, but it’ll stop serving requests when it goes to sleep or turns off, and a sophisticated hacker could probably steal your private data. The cherry on top is that your hard drive might melt if your computer tries serving too many requests at once!
Unless you like hacked, melted laptops, you’ll probably want to rent a server from the cloud. While you sacrifice some control by not having access to the physical machine, you’ll abstract away a lot of configuration and maintenance you likely don’t want to deal with anyway. And if you’re willing to pay a bit more, you can easily rent a machine – or several – that are significantly stronger than your laptop. So how do we get started?
We previously covered a high-level overview of the cloud, as well as a tutorial on storing data. But what about the engines of the cloud? In this final post, we’ll cover two compute-focused Amazon Web Services. We’ll start with the fundamental cloud building block, EC2, before moving on to server-less computing with Lambda.
Table of contents
Background
The holiday season is a recurring chaotic time for retailers. Q4 accounts for a staggering 33-39% of Macy’s and Kohl’s yearly revenues, for example, and even with Prime Day in the summer, Amazon’s Q4 is still around 31%. Much of this holiday rush takes place online, translating to a lot more users spending a lot more time on stores’ websites.
Put yourself in the shoes of an Amazon infrastructure engineer in October 2005, a few years after the dot-com bubble, but before the cloud industry really started. You know you have to do something to handle the tsunami of traffic on the horizon: the last thing you want is for the site to be down, millions of dollars of sales slipping by as frustrated shoppers switch to another website.[1]
One way to handle the additional load is to buy more computers. (There are indeed stories of early Amazon engineers preparing for the holidays by buying the most powerful servers they could find and crossing their fingers!) These extra servers should indeed handle the spike in traffic. But when the holiday buzz ends, that extra compute will end up sitting around unused until the next holiday season.[2]
The alternative would be to rent compute somehow. Ideally, resources would elastically and automatically increase and decrease to your immediate needs, rather than needing to guess ahead of time. You’d abstract away the physical hardware, instead just dipping into a “pool” of resources.
Amazon Web Services was born out of needs like these in the fledgling internet: dynamically accessing the compute resources you need, when you need them. We’ve already covered one of their fundamental storage offerings: Amazon Simple Storage Service (S3), a catch-all Dropbox analogue for storing data. But let’s now turn to Amazon’s fundamental compute offering: Elastic Compute Cloud.
EC2: Elastic Compute Cloud
We can use Amazon EC2 to access the fundamental building block of the cloud: the virtual server. Data centers are filled with servers, which are logically partitioned into virtual servers, allowing multiple people to simultaneously and independently use the hardware.
One server could be simultaneously running simulations for a weather forecast, fetching data from multiple databases, sending the HTML for a dozen webpages, and more. Importantly, this physical server would be abstracted away from its users beyond the configurations of their virtual servers, letting them focus on their applications.
At AWS, virtual servers are called EC2 instances. Released in 2006, EC2 was one of Amazon’s first cloud services and has grown to be a central component of the tech stacks of Netflix, Pinterest, Lyft, and many others. EC2 instances are modular and configurable, allowing users to optimize for compute, memory, GPU, storage, or a combination depending on their needs. A GPU-optimized instance could be used for training machine learning models, for example, while a storage-optimized instance could host a database.
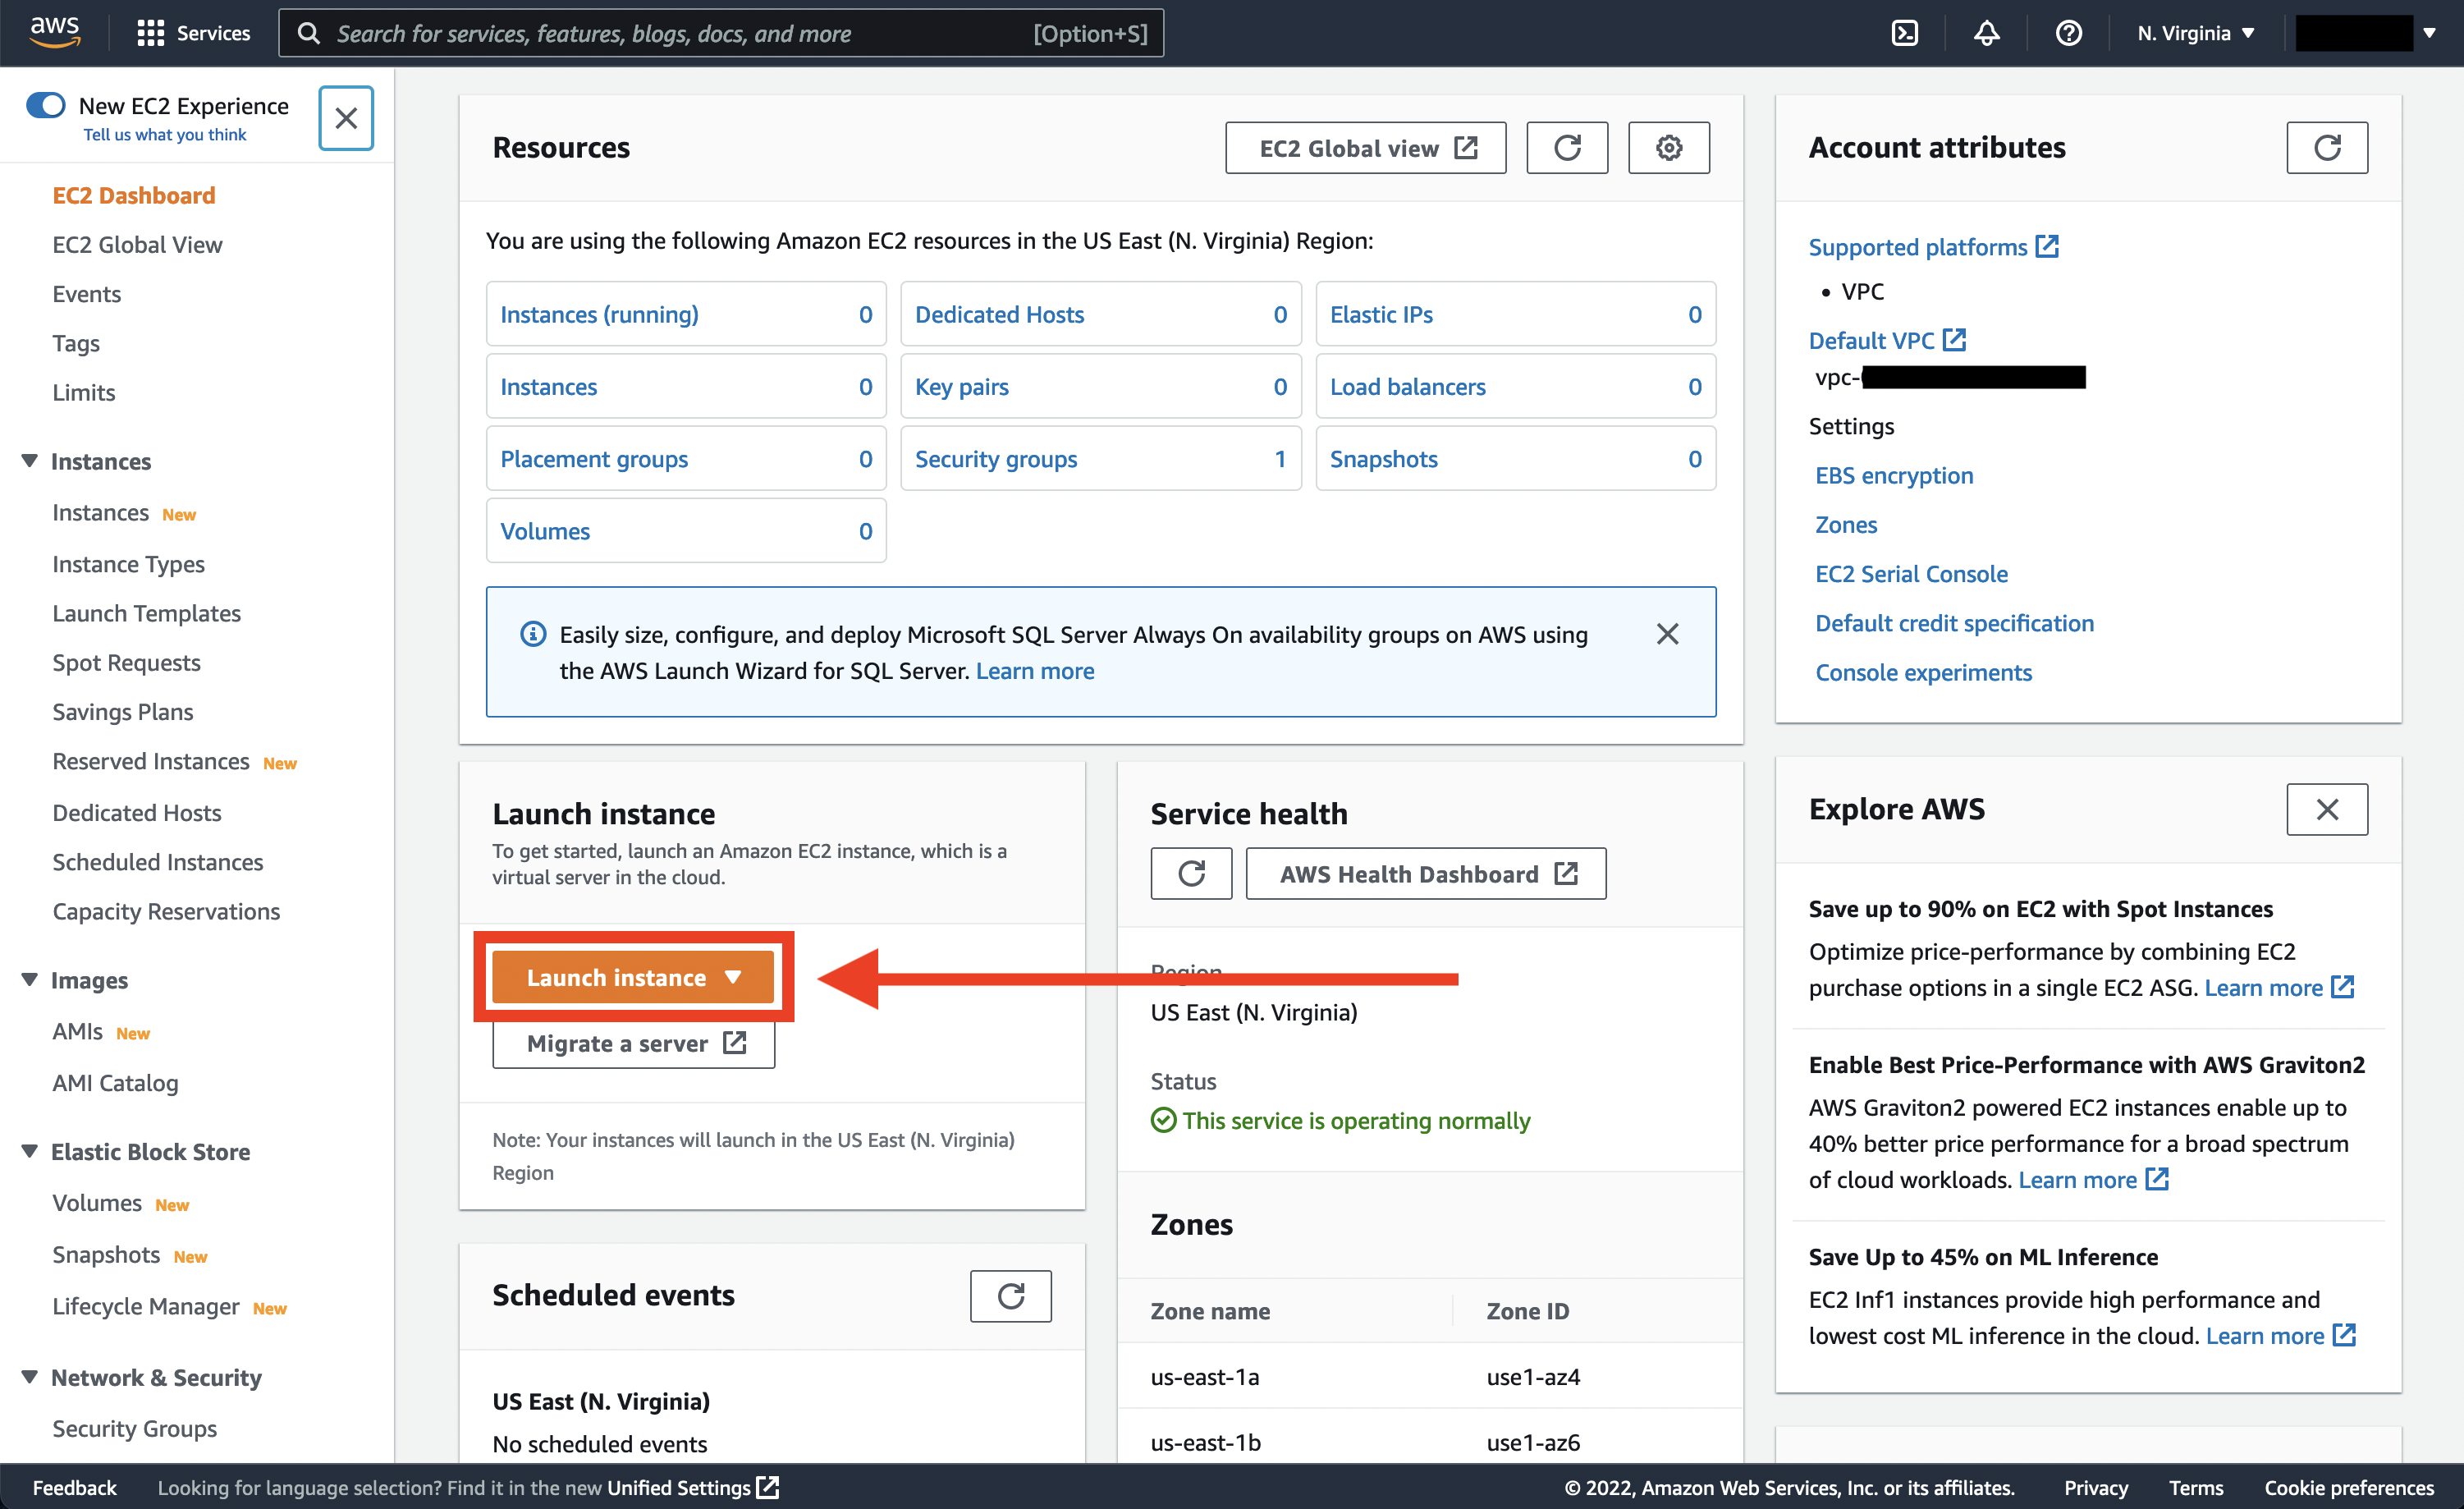
Let’s now create an EC2 instance to take a closer look. We log into our AWS account, then navigate to EC2 from the menu of services. We should see something like the image below. Let’s click on the Launch instance button and begin.
Set up
AMI: Amazon Machine Image
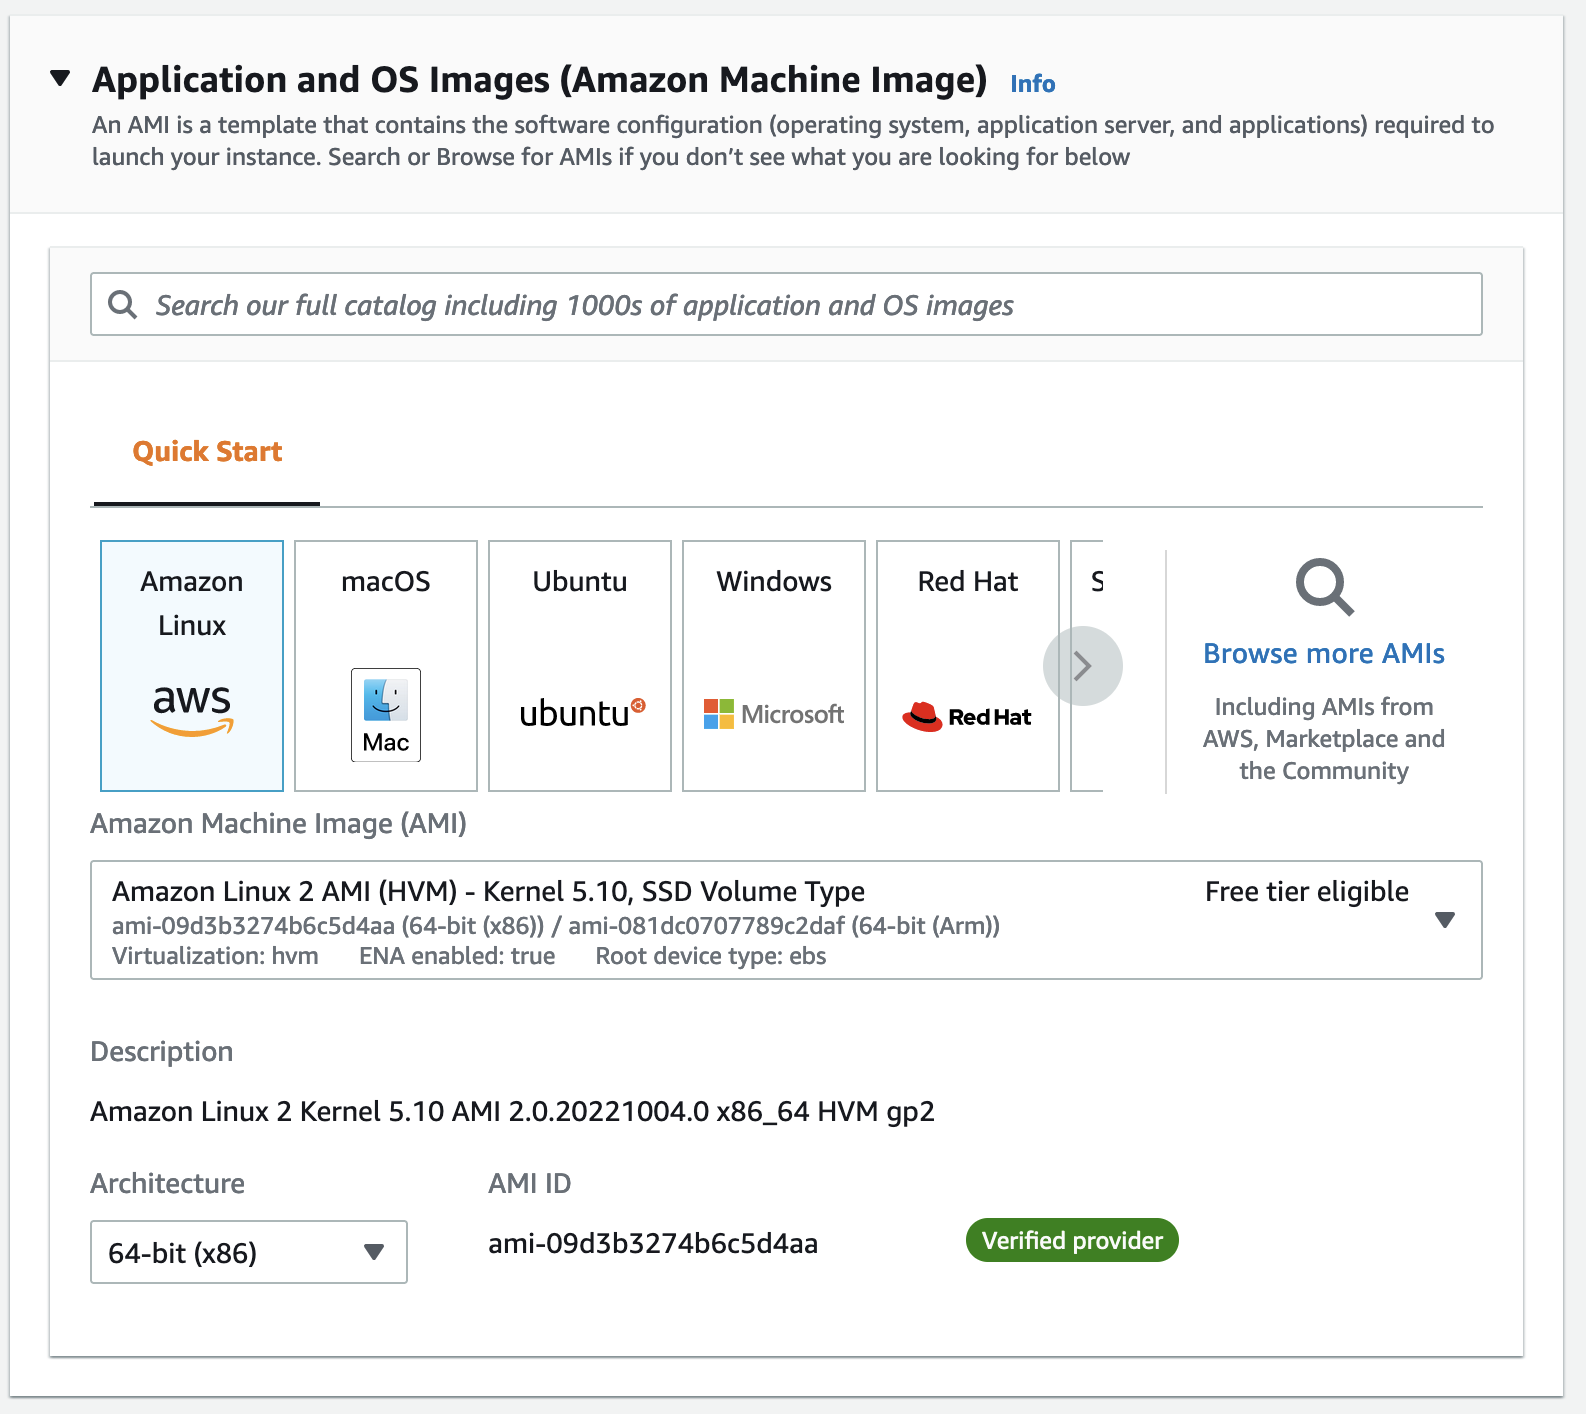
The first thing we’ll do when launching an EC2 instance is select the Amazon Machine Image. An AMI specifies the basic software configuration our instance: the operating system, application server, and applications required for your server to run. AMIs are like Docker images: reusable templates that let us create the exact environment we want each time.
The default AMI comes with a Linux kernel optimized for EC2, the system and service manager systemd, the GCC compiler, and other very low-level software. We could create our own AMI if we had strong opinions about how to optimize for our use case. But this is an intro tutorial, so let’s just choose the default Amazon Linux 2 AMI.
Instance Type
Next up is Instance Type, where we choose the hardware for our server. We won’t want to deviate from the t2.micro option, which is covered by the Free Tier. In a production setting, we could decide to optimize for CPU (for running a wide range of system operations simultaneously), GPU (for machine learning or graphics processing), storage (for slow reads and writes of persistent data), memory (for fast reads and writes of volatile data), or some combination.
We can’t change the instance type once we launch our instance, so make sure you don’t accidentally click the one that charges $31.21 per hour! Triple-checking that we’ve selected t2.micro, we can continue to the next step.
Key Pair
We’ll now create a key pair. AWS uses public-key cryptography to secure the login information for EC2 instances. Rather than a password, we’ll use the key pair to remotely log into our instance via SSH.
We’ll click on Create a new key pair. We then give it a name and stick with the RSA and .pem defaults. (Select PuTTY if you’re using Windows.)
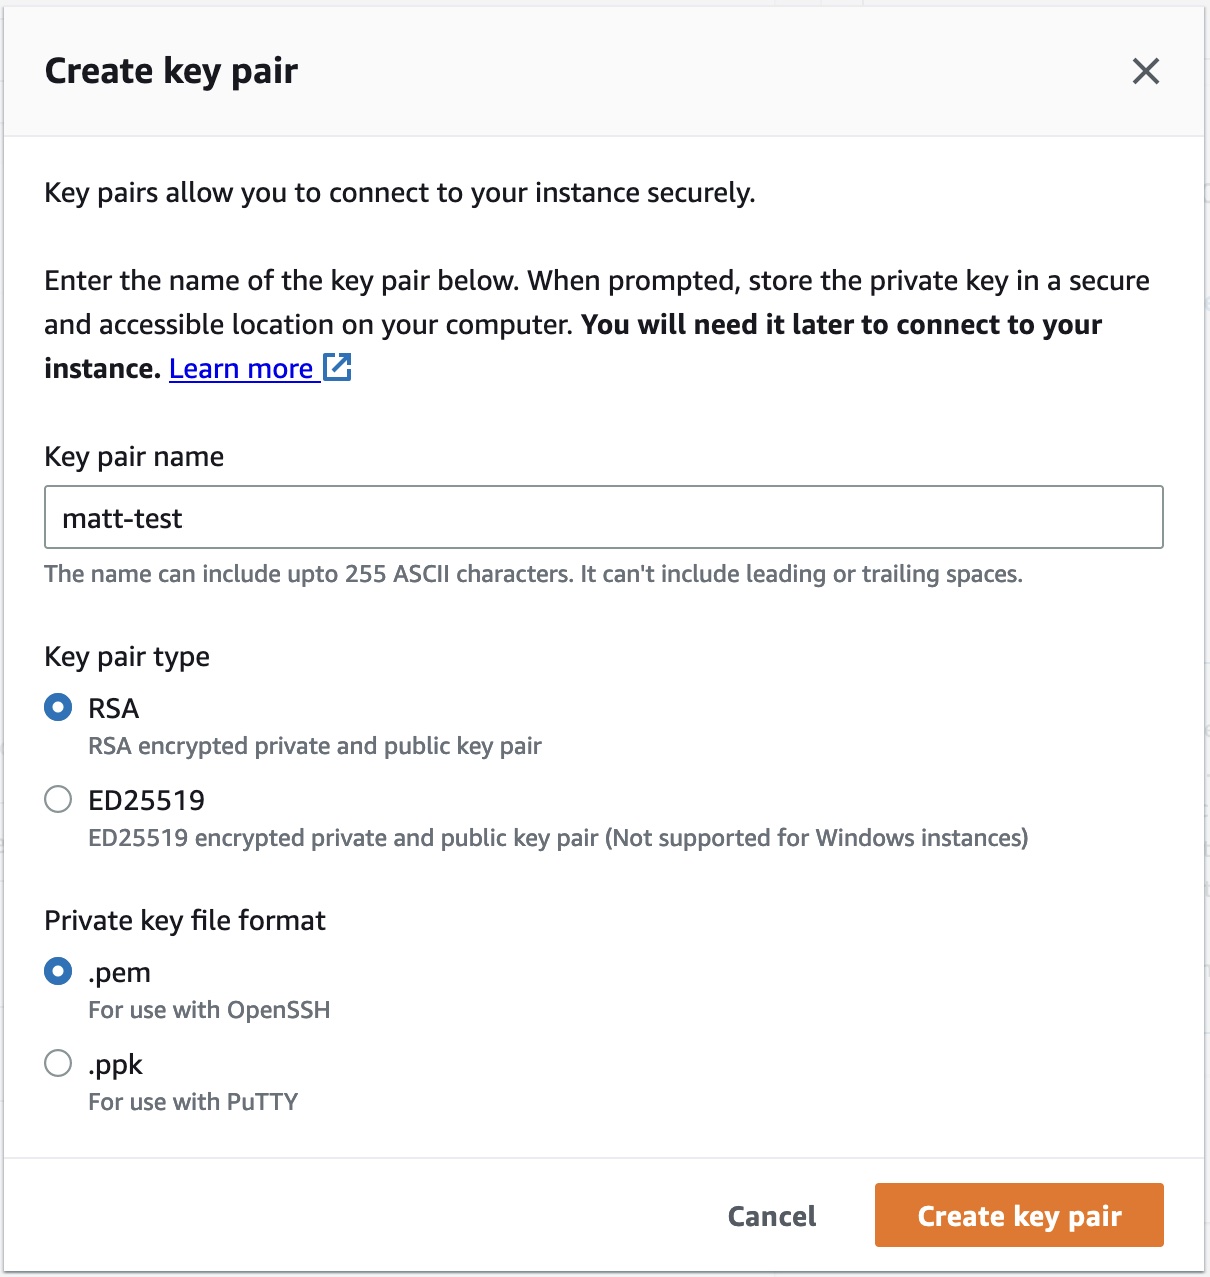
Once we click Create key pair, Amazon will save a public part of our key, and our computer will download the private key. Make sure you don’t lose this .pem (or .ppk) file, as we’ll use it to identify ourselves when remotely accessing the EC2 instance.
Network settings
We now set the rules for how to access our EC2 instance via the internet. For this demo, let’s just click Select existing security group, then our default VPC (virtual private cloud). If you followed along in the previous AWS Storage post, you’ll have already tinkered with the inbound and outbound access rules for this VPC.
Configure storage
We’ll leave our storage config at the default values, which are well within the Free Tier limits. Any data we write to our instance will be deleted once our demo is over; if we cared about persisting this data, we could click Add new volume to reserve an Amazon Elastic Block Storage (EBS) volume and save our data there. But let’s stick with the root volume for now.
Advanced details
We’ll skip this section for our demo. But this is where we can specify configurations like using on-demand spot instances, shutdown and hibernate behavior, whether we want detailed Amazon CloudWatch logs, and more.
Connecting to our instance
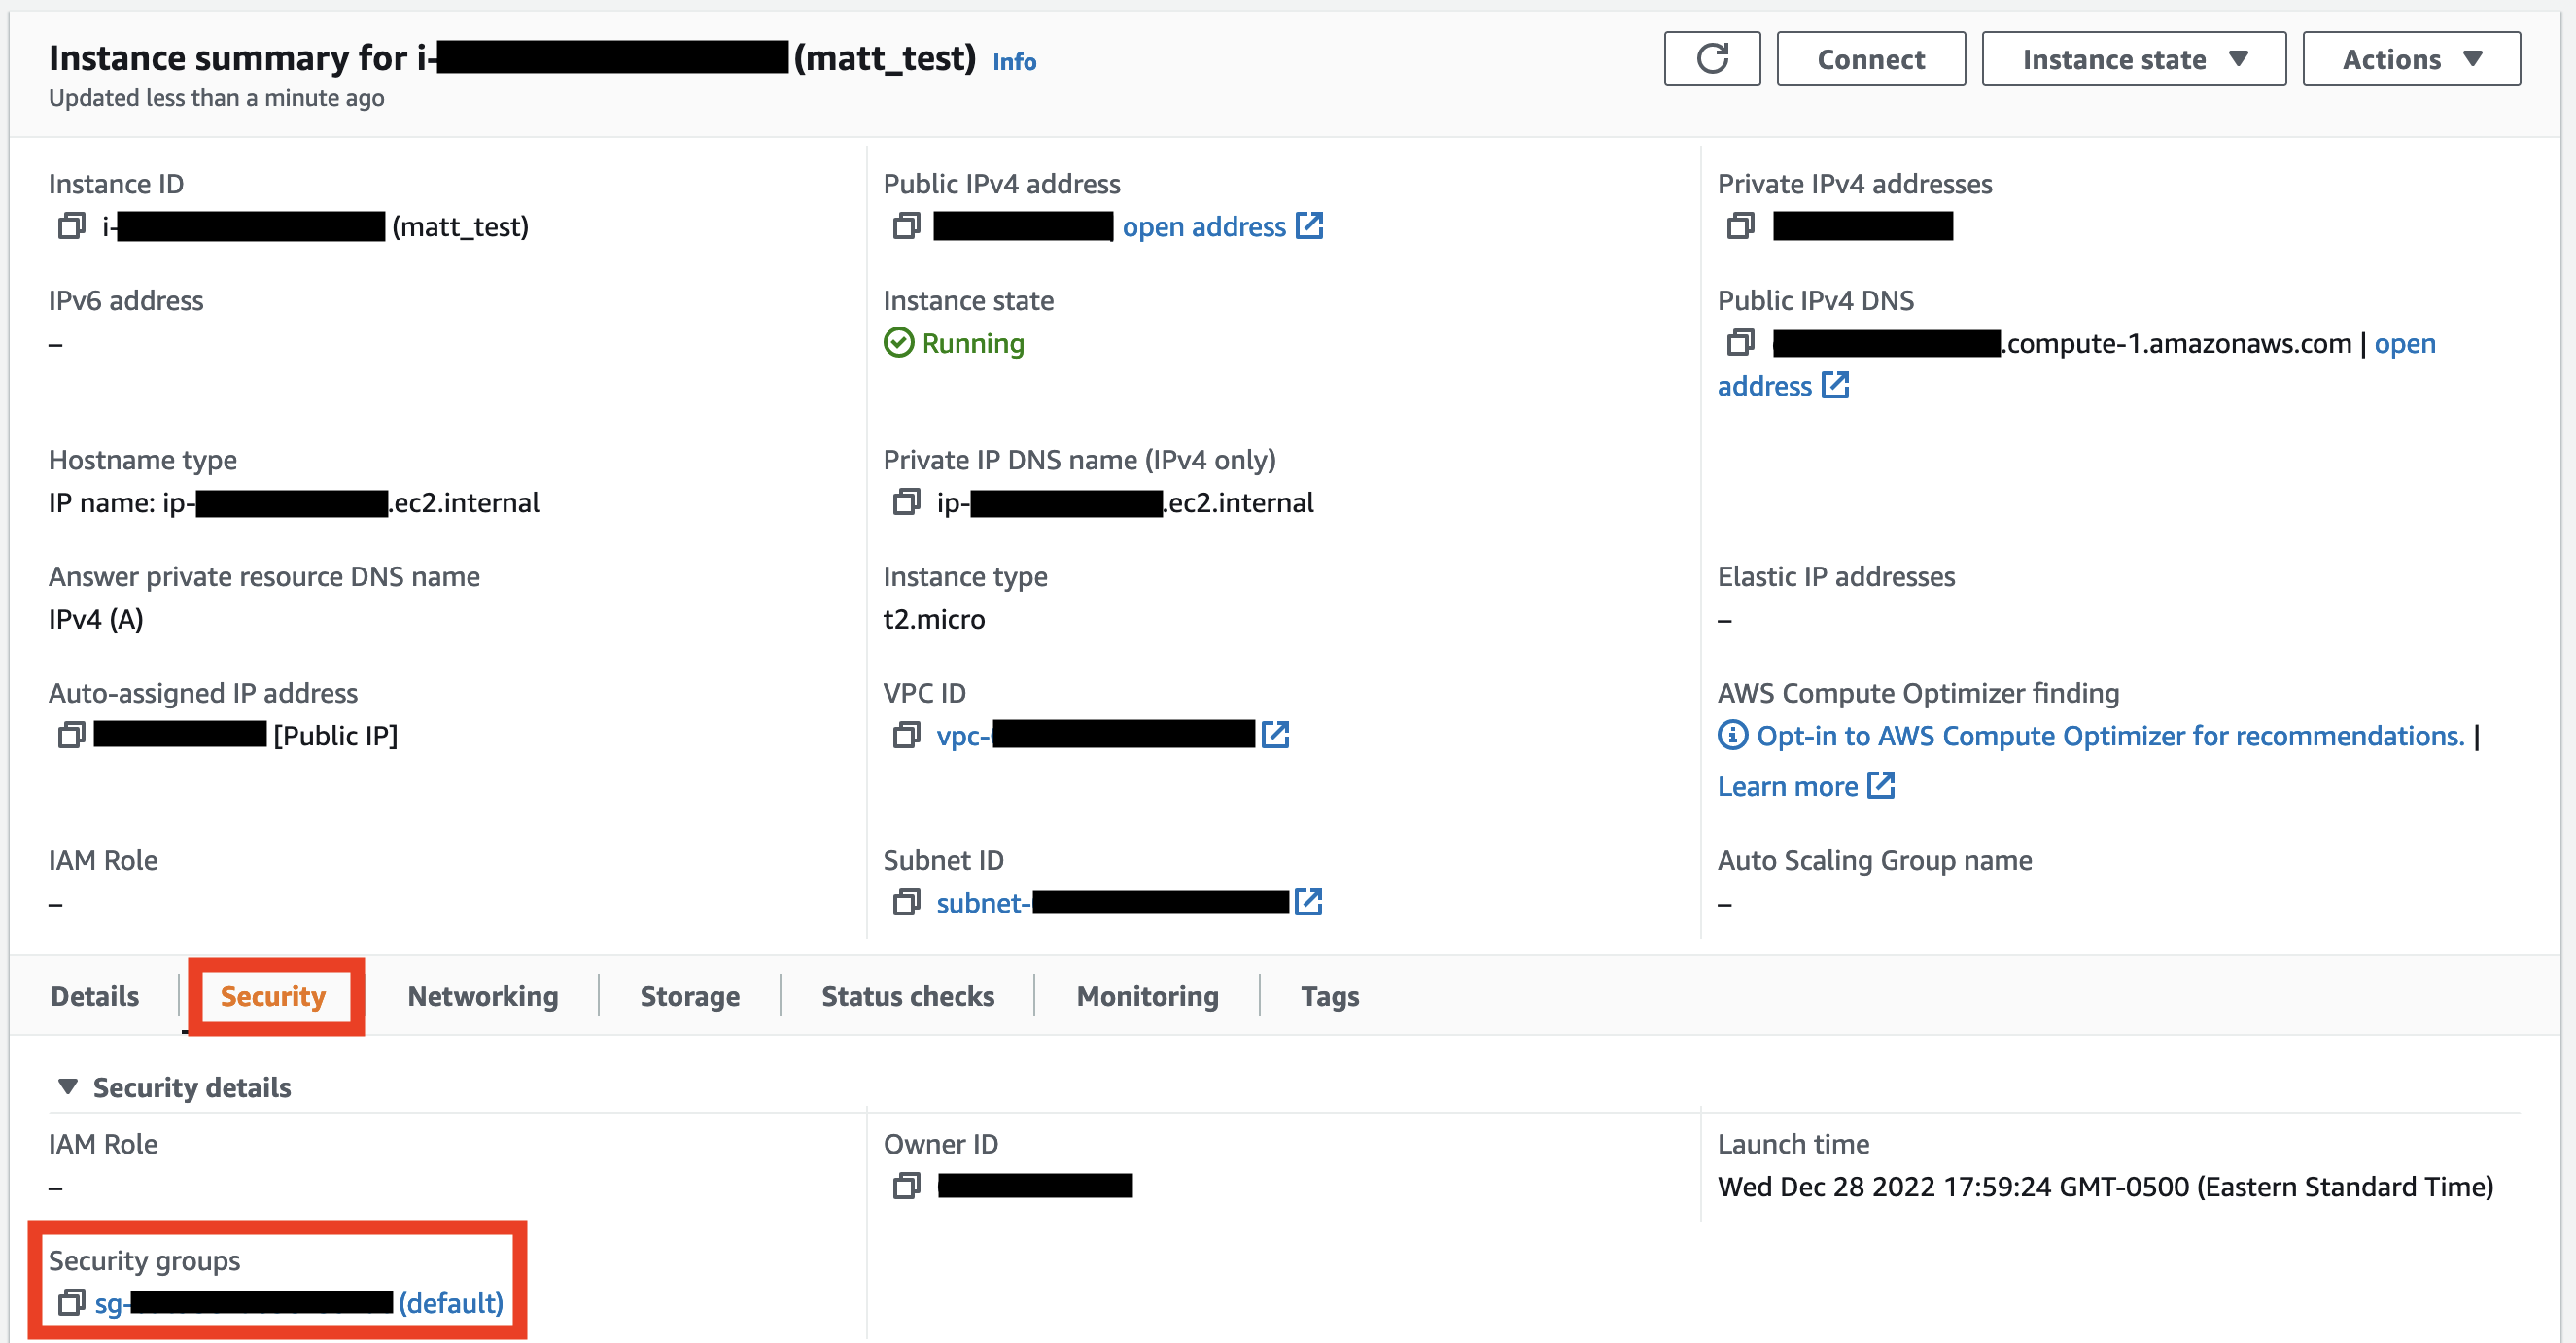
Our instance will be available within a few minutes after we hit Create. On the EC2 home page, we can then click on Instances and see something like the image below.

Let’s now connect to our instance. We’ll use SSH, a network protocol that enables secure communication over an unsecured network (like the internet). Once we’ve SSH’d into our instance, we will be able to control the machine as if we were in a Terminal on our laptop.
The first thing to do is modify the instance’s security group to allow inbound traffic. On our instance page, we’ll click on the Security tab at the bottom, then the link for the instance’s security group.
On the Security Group page, click Edit inbound rules, then Add rule. Select SSH for Type, then My IP for Source. Finally, click Save rules.
So let’s try connecting to our instance now. The command is ssh followed by the Public IPv4 DNS, available on the Instance page. You can also go to Connect > SSH client to get the address.
| bash |
1
2
3
ssh ec2-user@xx.xx.xx.xxx
# ec2-user@ec2-xx-xx-xx-xxx.compute-1.amazonaws.com:
# Permission denied (publickey,gssapi-keyex,gssapi-with-mic).
We get a Permission denied error because we haven’t passed in our private key. Let’s change directories to the one with our key and try again.
| bash |
1
2
3
4
5
6
7
8
cd path/to/your/key
ssh -i matt-test.pem ec2-user@ec2-xx-xx-xx-xxx.compute-1.amazonaws.com
# The authenticity of host 'ec2-xx-xx-xx-xxx.compute-1.amazonaws.com
# (xx.xx.xx.xxx)' can't be established.
# ED25519 key fingerprint is SHA256:xxxxxxxxxxxxxxxxxxxxxxxxxxxxx.
# This key is not known by any other names
# Are you sure you want to continue connecting (yes/no/[fingerprint])?
# yes
So far so good, but then we get another error:
| bash |
1
2
3
4
5
6
7
8
9
# @@@@@@@@@@@@@@@@@@@@@@@@@@@@@@@@@@@@@@@@@@@@@@@@@@@@@@@@@@@
# @         WARNING: UNPROTECTED PRIVATE KEY FILE!          @
# @@@@@@@@@@@@@@@@@@@@@@@@@@@@@@@@@@@@@@@@@@@@@@@@@@@@@@@@@@@
# Permissions 0644 for 'matt-test.pem' are too open.
# It is required that your private key files are NOT accessible by others.
# This private key will be ignored.
# Load key "matt-test.pem": bad permissions
# ec2-user@ec2-xx-xx-xx-xxx.compute-1.amazonaws.com:
# Permission denied (publickey,gssapi-keyex,gssapi-with-mic).
The error is that our private key has permission code 644, which means that anyone can read the file. This is the default access level for new files, but AWS considers this too insecure: anyone with your key could impersonate you.
So we’ll need to modify the file privacy to make it more secure. To do so, we use chmod to change the read and write permissions of the file. Specifically, we’ll change the file so that the only valid action is a read by the owner (us). Even if someone copied our private key to another computer, or a different user on our network somehow found the key, the file wouldn’t open because that person isn’t the owner. As an additional precaution, we remove our write access as well.
The chmod code for this permission level is 400: owner can only read (4), security group can’t read/write/execute (0), and others can’t read/write/execute (0). Let’s therefore run this command in the Terminal:
| bash |
1
chmod 400 matt-test.pem
Now when we try to connect, we succeed:
| bash |
1
2
3
4
5
6
7
8
9
10
11
ssh -i matt-test.pem ec2-user@ec2-xx-xx-xx-xxx.compute-1.amazonaws.com
# The authenticity of host 'ec2-xx-xx-xx-xxx.compute-1.amazonaws.com
# (xx.xx.xx.xxx)' can't be established.
# ED25519 key fingerprint is SHA256:xxxxxxxxxxxxxxxxxxxxxxxxxxxxx.
# This key is not known by any other names
# Are you sure you want to continue connecting (yes/no/[fingerprint])?
# yes

#        __|  __|_  )
#        _|  (     /   Amazon Linux 2 AMI
#       ___|\___|___|
We’re in! To the left of our cursor we should see something like [ec2-user@ip-xx-xx-xx-xxx ~]$, where we previously just saw $. Let’s now run some quick commands to explore the instance.
| bash |
1
2
3
4
5
6
7
8
ls
# (nothing)

whoami
# ec2-user

python3 --version
# Python 3.7.15
Python already comes installed, which is convenient! Let’s download a sample Python file from GitHub and run some basic calculations on our EC2 instance. We’ll use curl to download the file from the URL, then pass in some arguments to calculate_mean.py to get their average value.
| bash |
1
2
3
4
5
6
# Download file
curl -O https://raw.githubusercontent.com/mgsosna/code_samples/master/calculate_mean.py

# Run it
python3 calculate_mean.py 1 -5 0 33   # 7.25
python3 calculate_mean.py 0 1e5 -1e5  # 0.0
Let’s now train a random forest classifier on some generated data. We’ll download numpy, pandas, and scikit-learn, open Python, generate the data, then create the model.
We’ll first download the necessary libraries.
| bash |
1
2
3
4
5
6
7
8
9
10
11
12
13
14
15
16
17
18
19
20
21
22
23
24
25
26
27
28
29
30
31
32
33
34
35
36
37
python3 -m pip install numpy pandas scikit-learn
# Defaulting to user installation because normal site-packages is not writeable
# Collecting numpy
#   Downloading numpy-1.21.6-cp37-cp37m-manylinux_2_12_x86_64.manylinux2010_x86_64.whl (15.7 MB)
#      |████████████████████████████████| 15.7 MB 25.1 MB/s
# Installing collected packages: numpy
# Successfully installed numpy-1.21.6
# Defaulting to user installation because normal site-packages is not writeable
# Collecting pandas
#   Downloading pandas-1.3.5-cp37-cp37m-manylinux_2_17_x86_64.manylinux2014_x86_64.whl (11.3 MB)
#      |████████████████████████████████| 11.3 MB 23.8 MB/s
# Requirement already satisfied: numpy>=1.17.3; platform_machine != "aarch64" and platform_machine != "arm64" and python_version < "3.10" in ./.local/lib/python3.7/site-packages (from pandas) (1.21.6)
# Collecting pytz>=2017.3
#   Downloading pytz-2022.7-py2.py3-none-any.whl (499 kB)
#      |████████████████████████████████| 499 kB 29.1 MB/s
# Collecting python-dateutil>=2.7.3
#   Downloading python_dateutil-2.8.2-py2.py3-none-any.whl (247 kB)
#      |████████████████████████████████| 247 kB 32.8 MB/s
# Collecting six>=1.5
#   Downloading six-1.16.0-py2.py3-none-any.whl (11 kB)
# Installing collected packages: pytz, six, python-dateutil, pandas
# Successfully installed pandas-1.3.5 python-dateutil-2.8.2 pytz-2022.7 six-1.16.0
# Defaulting to user installation because normal site-packages is not writeable
# Collecting scikit-learn
#   Downloading scikit_learn-1.0.2-cp37-cp37m-manylinux_2_17_x86_64.manylinux2014_x86_64.whl (24.8 MB)
#      |████████████████████████████████| 24.8 MB 19.7 MB/s
# Requirement already satisfied: numpy>=1.14.6 in ./.local/lib/python3.7/site-packages (from scikit-learn) (1.21.6)
# Collecting scipy>=1.1.0
#   Downloading scipy-1.7.3-cp37-cp37m-manylinux_2_12_x86_64.manylinux2010_x86_64.whl (38.1 MB)
#      |████████████████████████████████| 38.1 MB 41.1 MB/s
# Collecting threadpoolctl>=2.0.0
#   Downloading threadpoolctl-3.1.0-py3-none-any.whl (14 kB)
# Collecting joblib>=0.11
#   Downloading joblib-1.2.0-py3-none-any.whl (297 kB)
#      |████████████████████████████████| 297 kB 34.3 MB/s
# Installing collected packages: scipy, threadpoolctl, joblib, scikit-learn
# Successfully installed joblib-1.2.0 scikit-learn-1.0.2 scipy-1.7.3 threadpoolctl-3.1.0
We can now run Python, generate our data, train the model, and make some predictions. We’ll use np.random.normal for the features and np.random.choice for the labels.
| bash |
1
2
3
4
5
6
7
8
9
10
11
12
13
14
15
16
17
18
19
20
21
22
python3
# Python 3.7.15 (default, Oct 31 2022, 22:44:31)
# [GCC 7.3.1 20180712 (Red Hat 7.3.1-15)] on linux
# Type "help", "copyright", "credits" or "license" for more information.
>>> import numpy as np
>>> import pandas as pd
>>> from sklearn.ensemble import RandomForestClassifier
>>>
>>> x1 = np.random.normal(0, 1, 5000)
>>> x2 = np.random.normal(0, 1, 5000)
>>> x3 = np.random.normal(0, 1, 5000)
>>> y = np.random.choice([0, 1], 5000)
>>>
>>> df = pd.DataFrame({'x1': x1, 'x2': x2, 'x3': x3, 'y': y})
>>> X = df[['x1', 'x2', 'x3']]
>>> y = df['y']
>>>
>>> rf = RandomForestClassifier(n_estimators=100)
>>> rf.fit(X, y)
# RandomForestClassifier()
>>> rf.predict(X[:10])
# array([0, 1, 0, 0, 1, 1, 1, 0, 0, 1])
Ta da! You’ve (technically) trained a machine learning model in the cloud. Since we’ve hit the pinnacle of EC2 use cases (😜), let’s sever our SSH connection and terminate our instance.
| bash |
1
2
3
exit
# logout
# Connection to ec2-xx-xx-xx-xxx.compute-1.amazonaws.com closed.
Now on our Instance page on the EC2 page, we can click on Instance state > Terminate instance. Note that we’ll lose our Python libraries and the calculate_mean.py file, since the instance’s data will be wiped as it’s made available for someone else to use. If we want to hold onto the instance a little longer, we can click Stop instance instead.
Beyond the basics
So we just created an EC2 instance, downloaded files from the internet, and ran some Python code. While this is awesome, we haven’t experienced anything that we couldn’t run on our own laptop, which is likely more powerful than a t2.micro server. So what value are we really getting from EC2?
The first thing to note is that there are a wide range of EC2 options beyond the Free Tier. If we wanted to run simulations for a research paper, we could simply select an EC2 instance with more CPU or GPU than our laptop. This would get the job done more quickly, especially if we don’t have a decent computer or can’t dedicate all of its resources to the simulations. (It would also prevent damaging your own laptop, which I accidentally did in college with a horribly inefficient R script!)
But more importantly, we need to remember that EC2 instances are just building blocks. For our research simulations, it may be more efficient to rent two or three instances and parallelize the calculations. If we’re using an EC2 instance to host a Flask API for our website, when traffic grows we can simply duplicate the instance and add a load balancer to distribute traffic. Better yet, we can automatically scale the number of instances up and down to meet demand, letting us focus more on our actual application. Q4, while still a demanding time for retailers, has become so much more manageable with cloud computing.
All this abstraction is a tremendous step forward from the internet of the early 2000’s. And yet… sometimes even a virtual server isn’t flexible or scalable enough for our use case. In that case, we may want a “server-less” option like Amazon Lambda.
Lambda
When is EC2 not the right choice?
With EC2, we’re given an entire virtual server. AWS gives us incredible flexibility in defining what this server will look like, letting us tinker with every hardware and software detail imaginable. This post’s EC2 setup section for a simple demo, for example, was dozens of lines long!
This flexibility means we can find some combination of EC2 instances that will meet essentially any task we can imagine. But this puts the responsibility on us to make sure we’re configuring our instances properly. This configuration may be straightforward if we’re performing a single task like training a machine learning model. But optimizing our resource usage becomes much more challenging when we’re juggling multiple instances, especially if we have multiple instance types. If our app is clunky, should we add more instances to host our database, fetch data from the database, or display it on the frontend? And how does this change as traffic to our app changes?
Another issue is that our instance is only accessible while it’s running. Just like how our laptop won’t respond to inputs while it’s sleeping or turned off, we can’t use our EC2 instance unless it’s running – and charging us for its usage. This is fine if we’re constantly sending requests to our instance. But if we expect to use our instance sporadically, then it can be expensive and inefficient to keep the instance running while we’re not using it.
What is Lambda?
In 2014, Amazon released Lambda, pushing the abstraction of the cloud to a new level with server-less computing. In contrast to EC2, we’re given zero information about the machine(s) running our code. Our only tunable parameter is the amount of memory our code is allowed to use.
Lambda executes code in response to events and automatically manages the underlying compute resources. If our code isn’t actively running on a machine, we’re not paying for anything. This is ideal for one-off actions like writing user actions to a database or generating predictions from an ML model, but we can even build a microservice-based web app or real-time streaming data processor.
Our workflow in Lambda will involve setting up functions that we then trigger from other services. No need to stress about configuring hardware, ensuring its security patches are up to date, and efficiently utilizing our resources.
The one major downside is that because we don’t have a dedicated virtual server waiting for requests, there is a brief delay when we first begin triggering our functions, as Lambda needs to find and reserve the necessary resources for us. Scattering our application across many Lambda functions, as opposed to one monolithic EC2 instance, can also significantly increase the complexity of our app as it grows. But these are often small prices to pay for the convenience of having the hardware completely abstracted away from us.
Creating a function
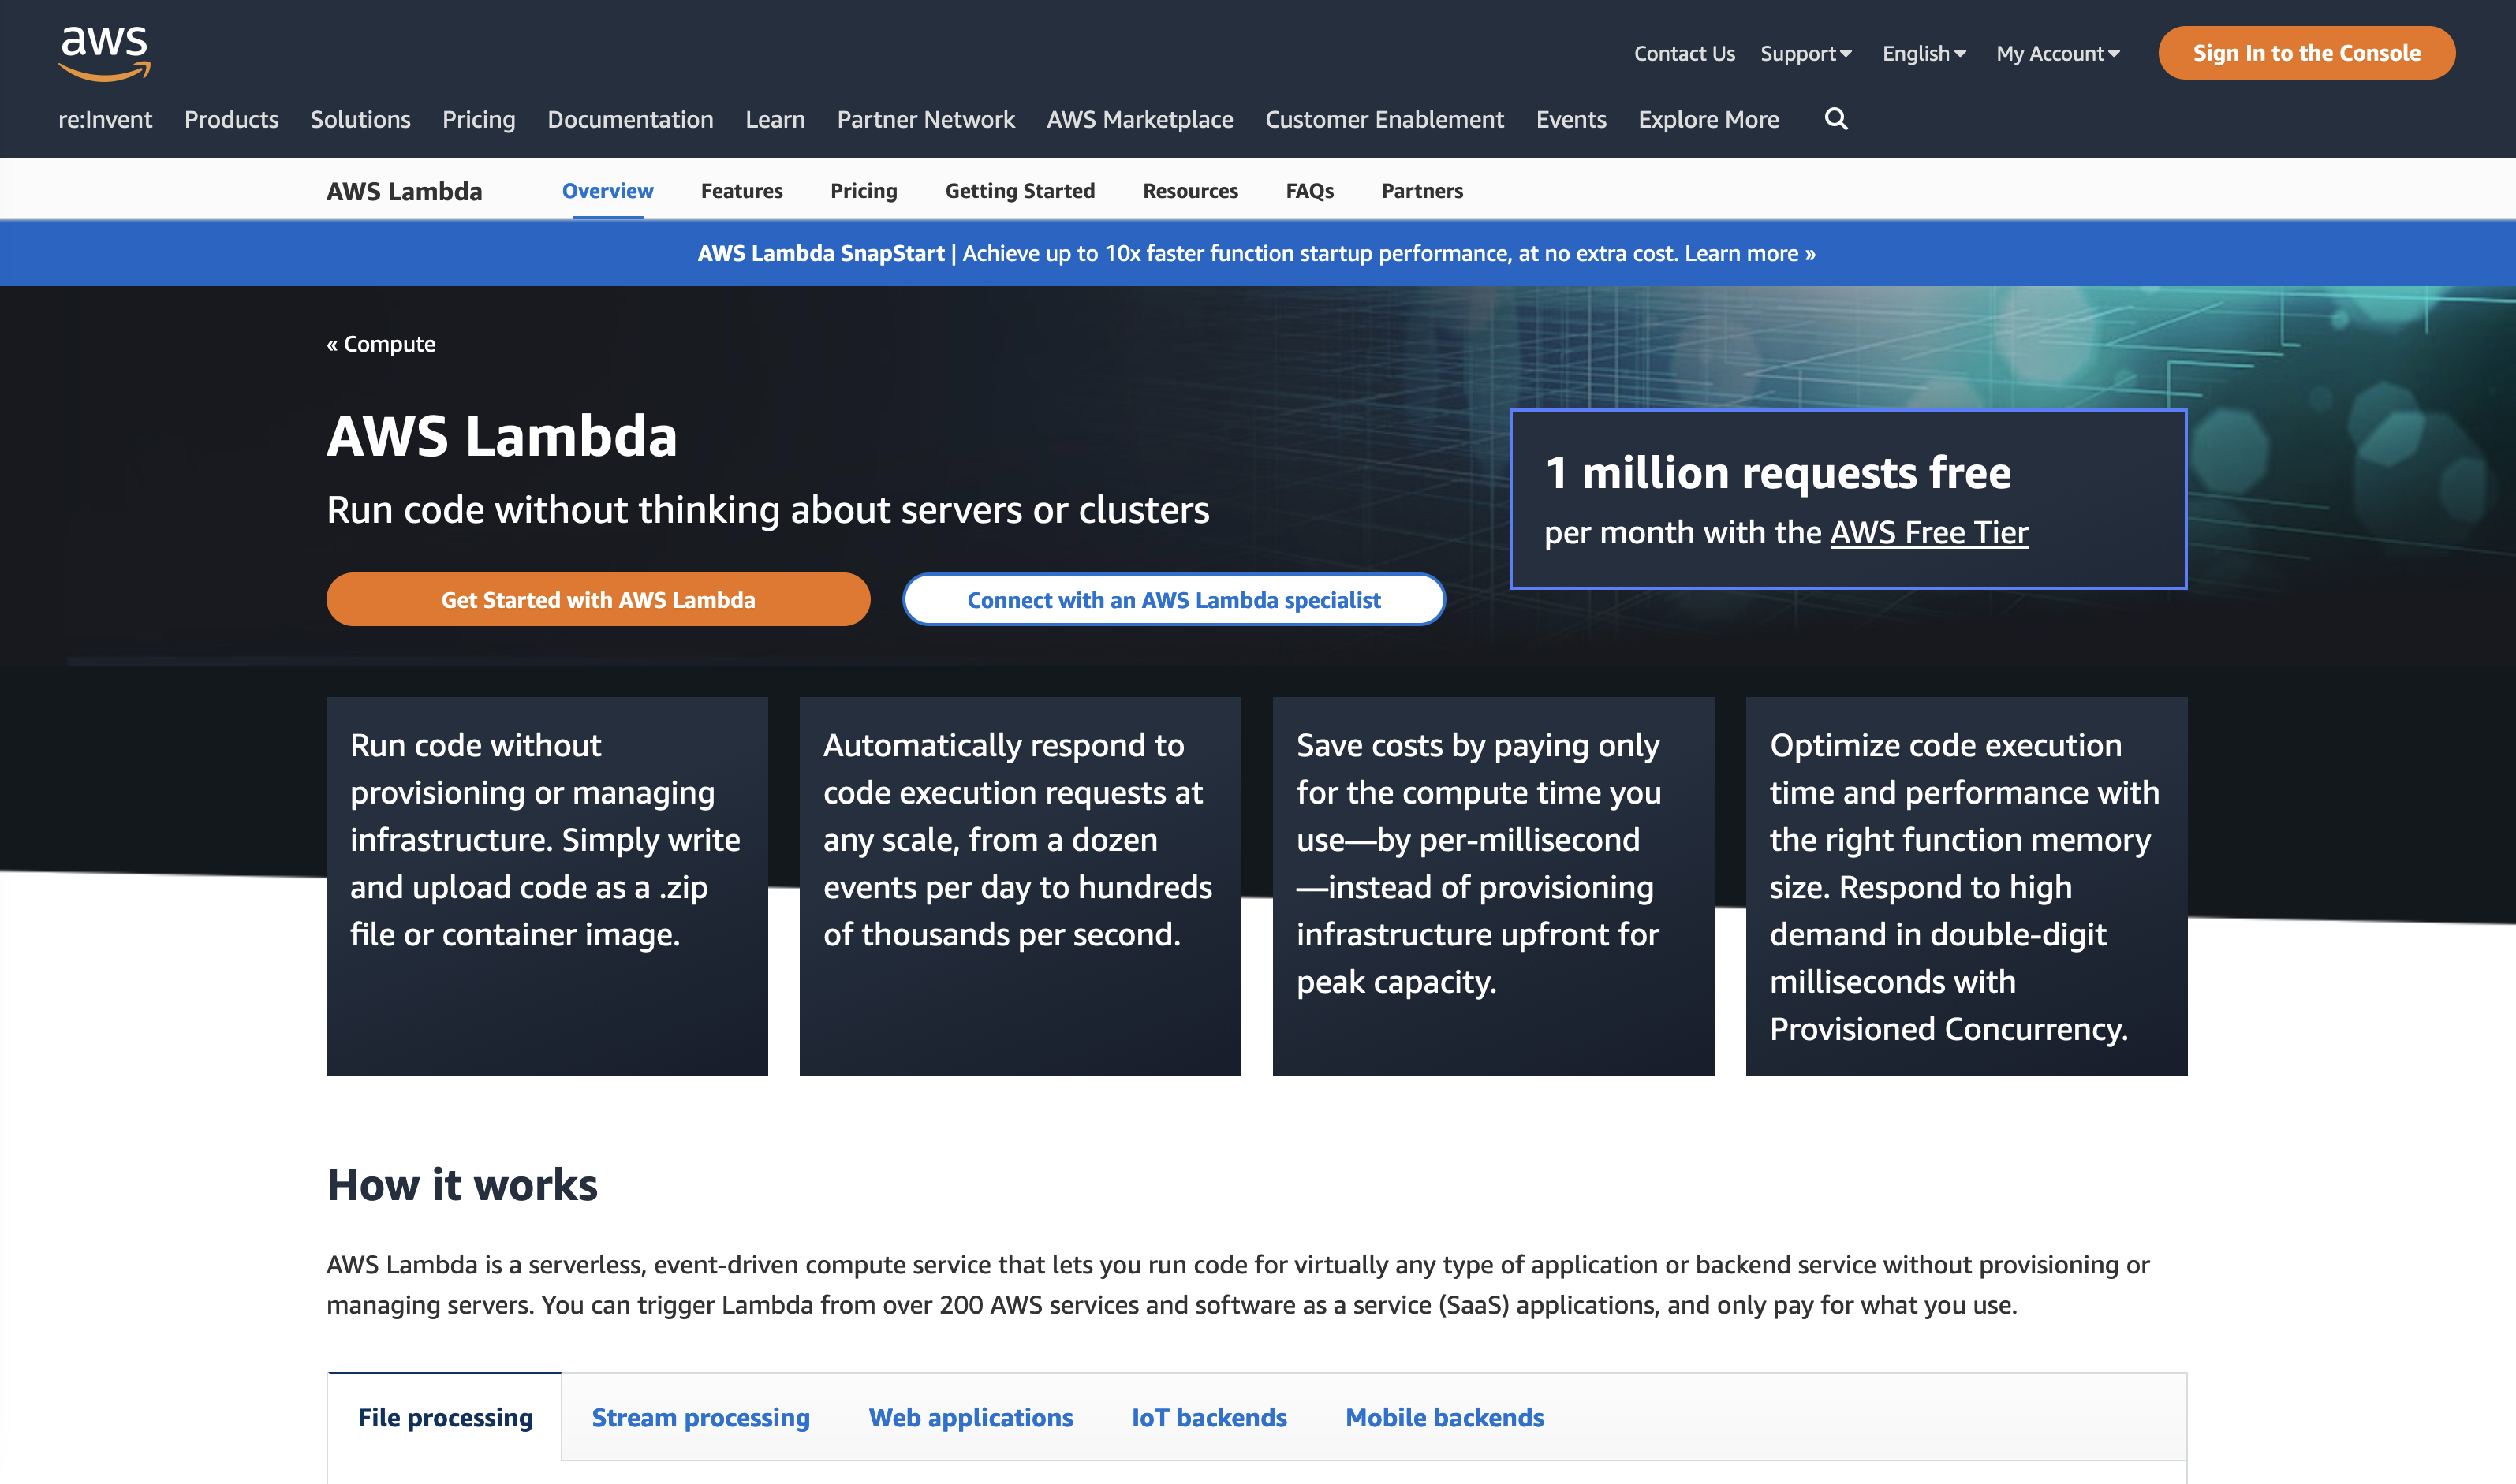
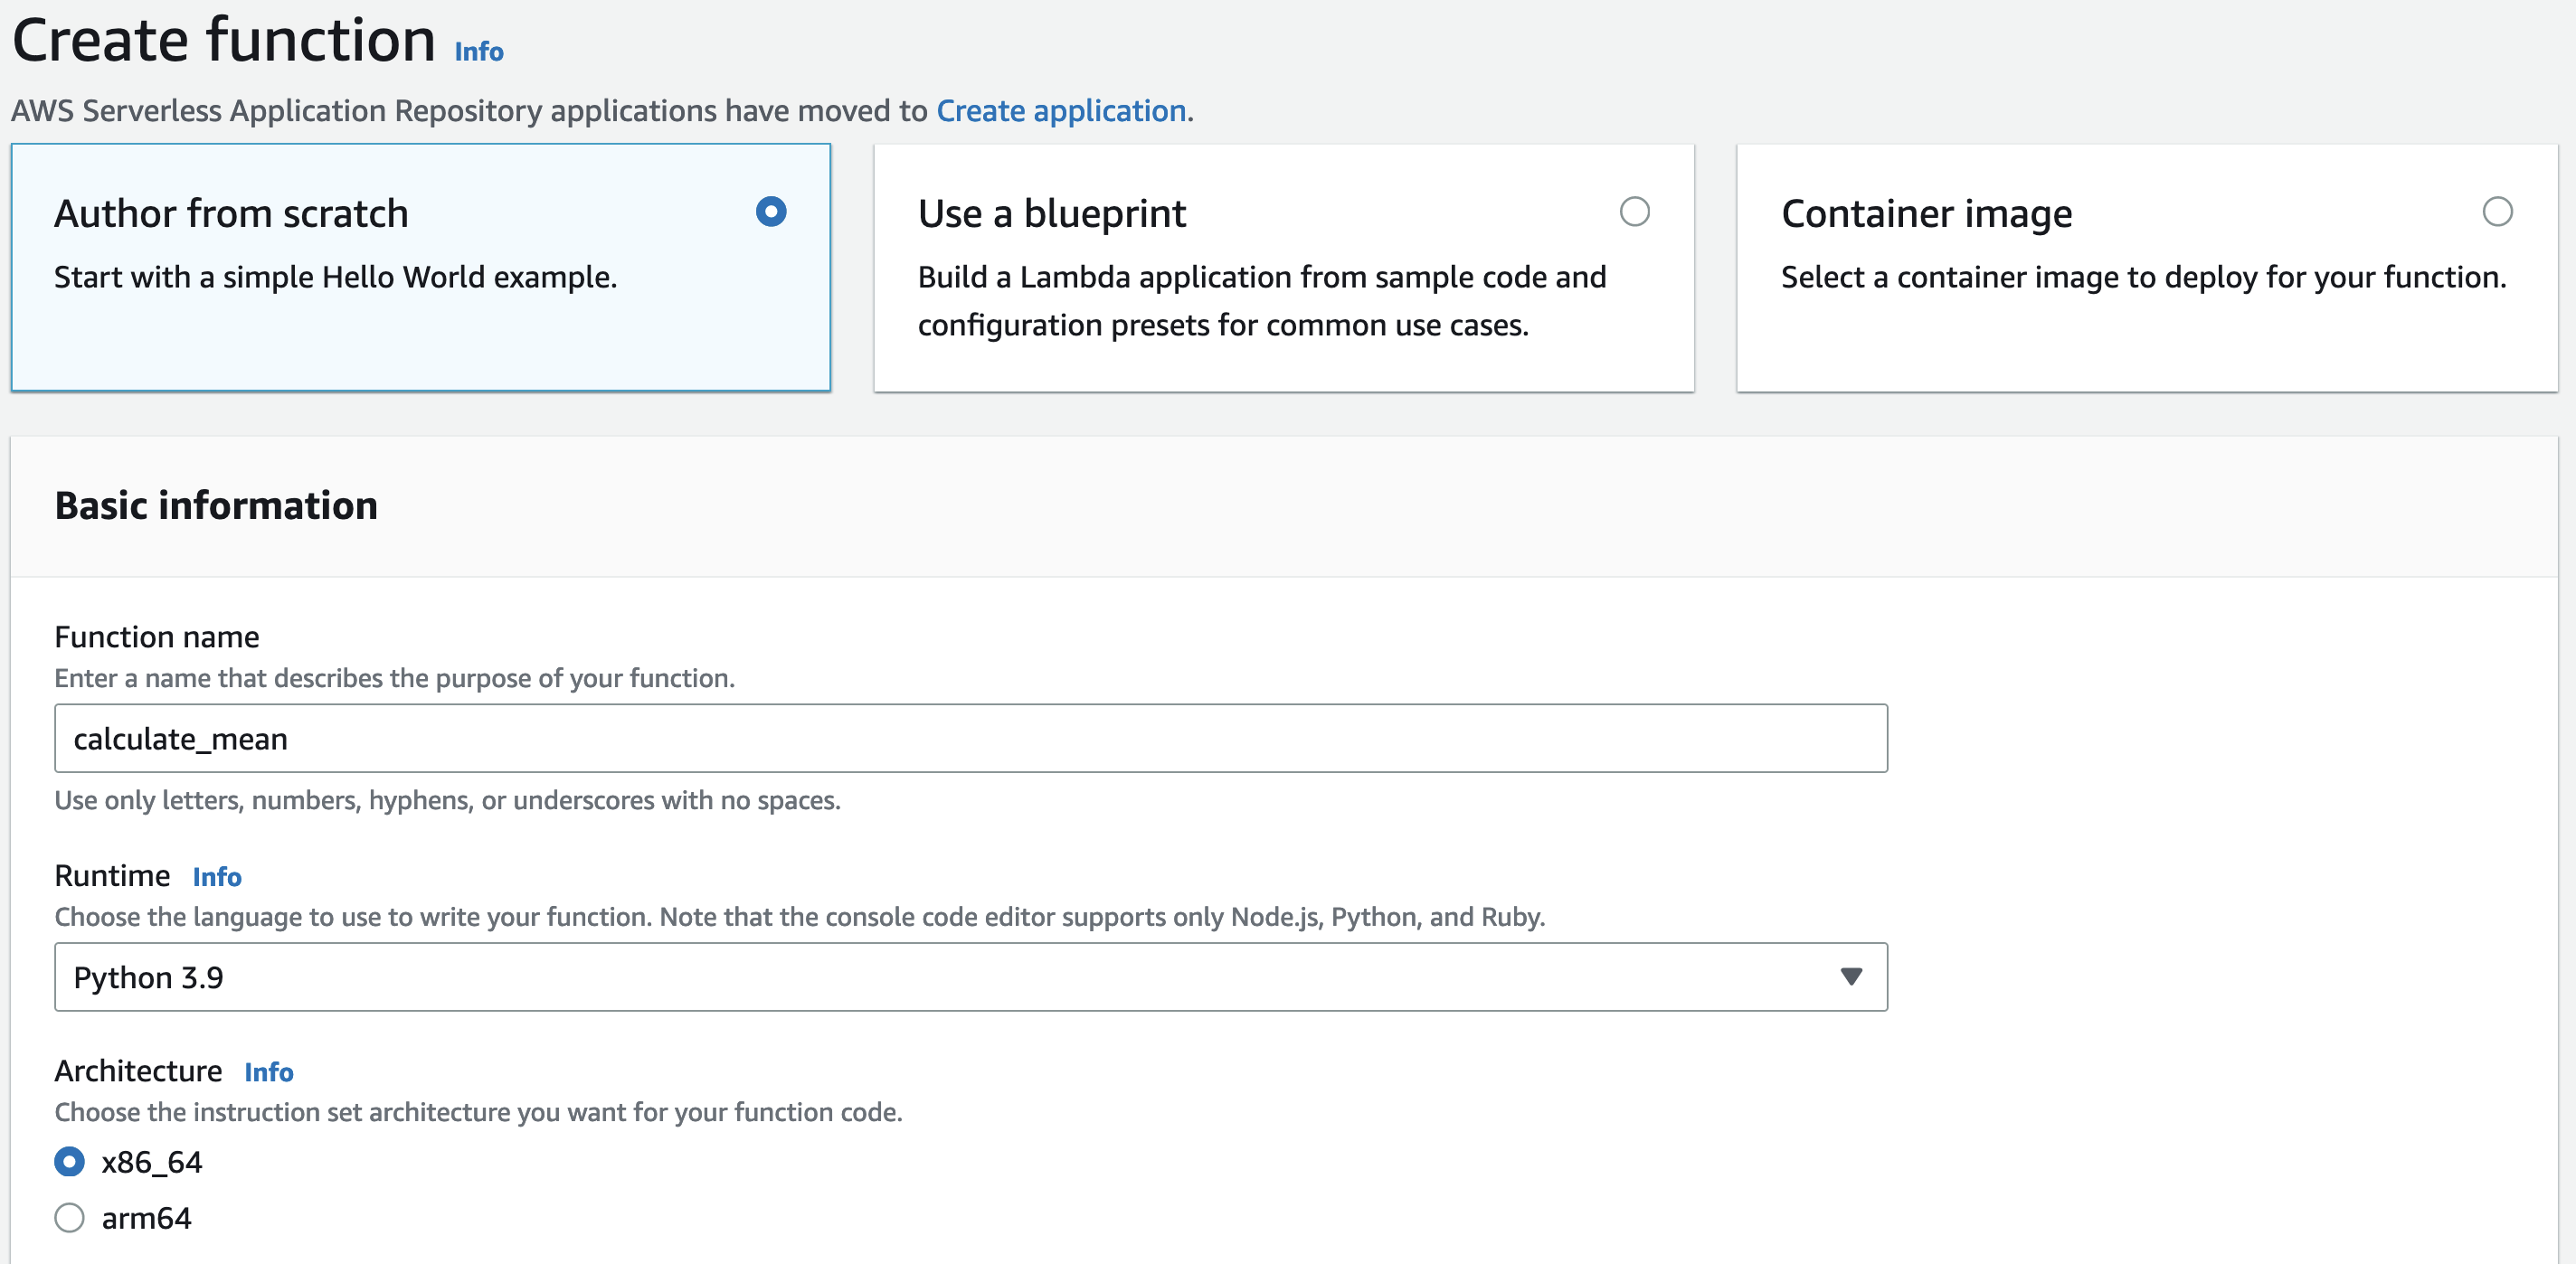
Let’s explore Lambda by setting up a function that returns the mean of a set of numbers. In the AWS Console, we start by navigating to the Lambda homepage. We then click the big orange Create function button. We’ll stick with the “Author from scratch” option, then give our function a name (calculate_mean) and select the Python 3.9 runtime. Then we scroll down and click Create function.
We’re then taken to the Lambda function page. Scrolling down to the Code tab, we see a basic template provided for our function:
| Python |
1
2
3
4
5
6
7
8
import json

def lambda_handler(event, context):
    # TODO implement
    return {
        'statusCode': 200,
        'body': json.dumps('Hello from Lambda!')
    }
And in the Test tab, we see a simple JSON input we can use to test our function.
1
2
3
4
5
{
  "key1": "value1",
  "key2": "value2",
  "key3": "value3"
}
We’ll want to change both of these for our calculate_mean function. Let’s start by changing the test input to an array of numbers like below. Give your test a name (e.g., my_array) and hit Save. You should see a green banner at the top that says, “The test event my_array was successfully saved.”
1
2
3
{
  "nums": [1, 2, 3, 4, 5]
}
Now let’s go back to the Lambda function and change it to the code below. Specifically, we remove the json import, extract the nums field from event, and change the return body field to calculate the mean. In a production setting, we’d want to add error handling for empty arrays, arrays with non-numbers, etc., but this is fine for now.[3]
| Python |
1
2
3
4
5
6
7
8
def lambda_handler(event, context):

  nums = event['nums']

  return {
    'statusCode': 200,
    'body': sum(nums)/len(nums)
  }
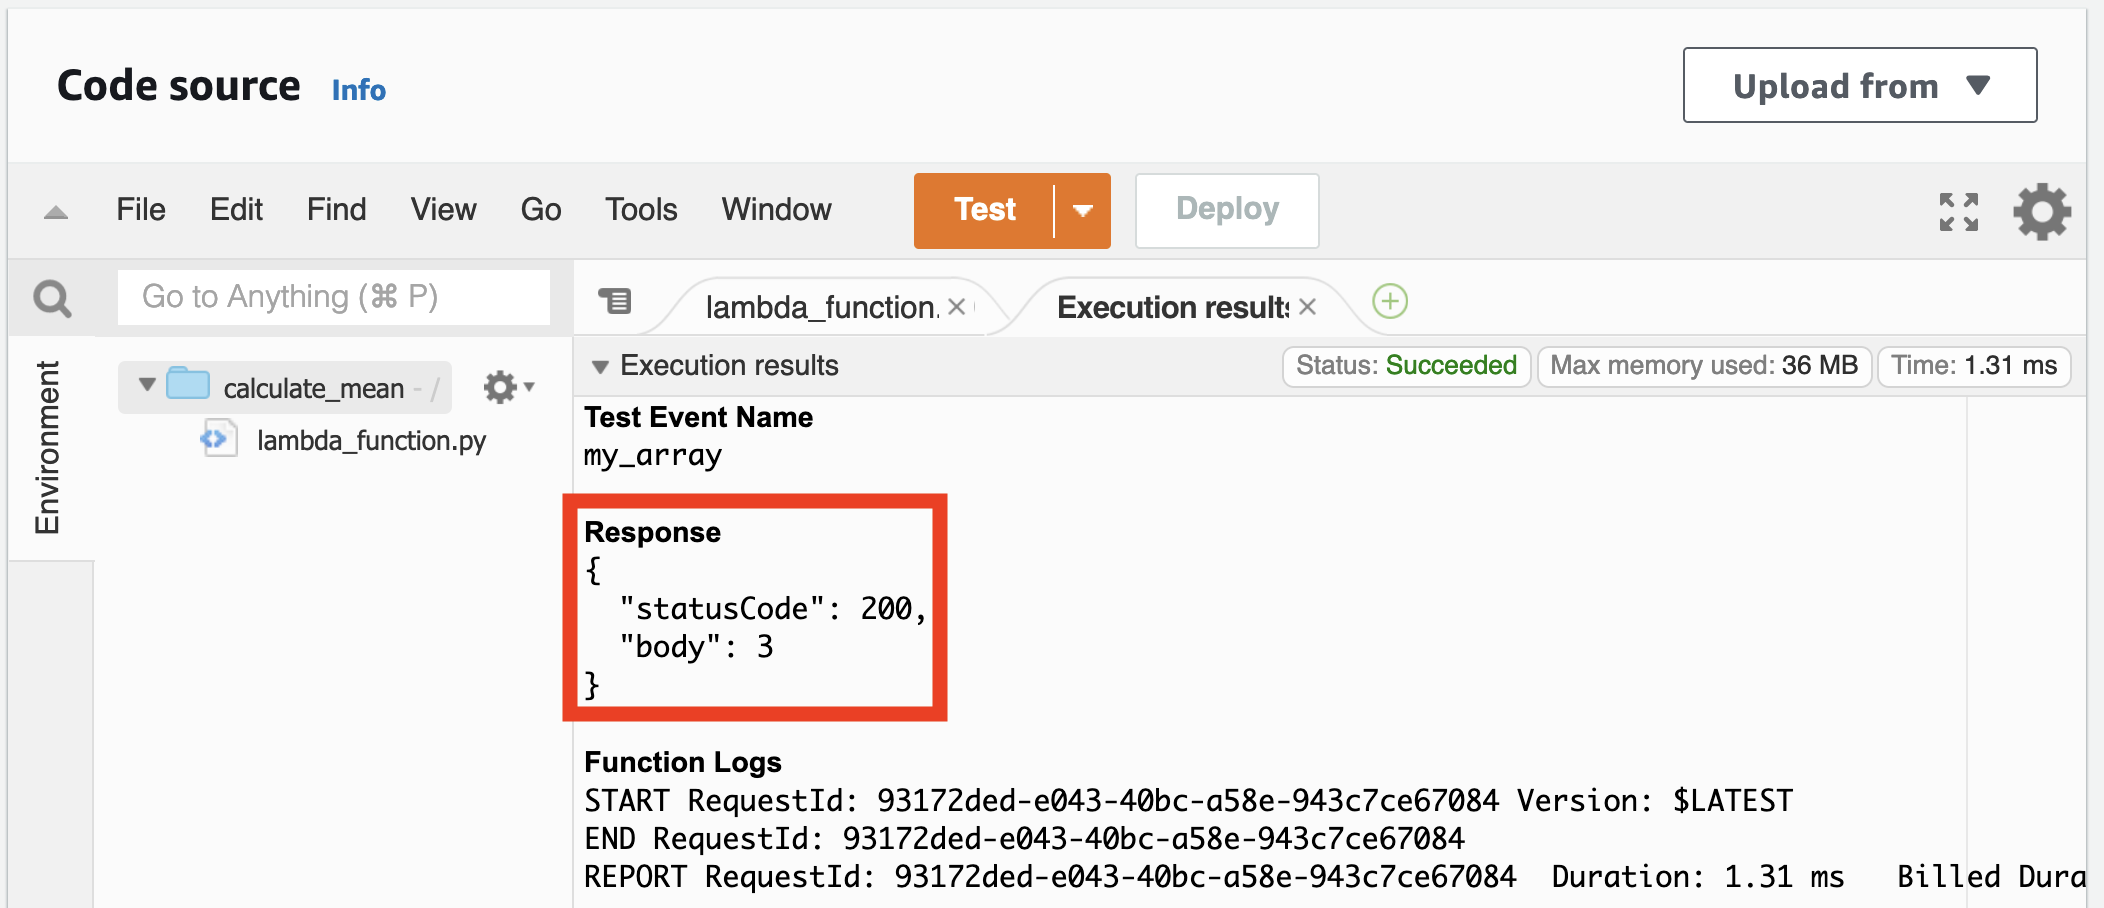
Save your function (⌘ + s, or File > Save), then click Deploy. You should see a green banner that says, “Successfully updated the function calculate_mean.” Now hit Test, which should generate some logs like below. The import thing is that the response body field should be the mean of the array of numbers in your test file (for us 3, the mean 1 to 5).
Let’s try this now from the AWS CLI. (If you haven’t downloaded the CLI, you can follow these steps.) Open a Terminal window, create an input JSON file, and send the file to your Lambda function. Lambda will return the response as a file, output.json here, which we can then view.
| bash |
1
2
3
4
5
6
7
8
9
10
11
12
13
14
15
16
17
18
# Create input file
echo '{"nums": [1, 2, 3]}' > input.json

# Invoke Lambda function
aws lambda invoke \
--function-name calculate_mean \
--payload file://input.json \
--cli-binary-format raw-in-base64-out \
output.json

# {
#     "StatusCode": 200,
#     "ExecutedVersion": "$LATEST"
# }

# View the output
cat output.json
# {"statusCode": 200, "body": 2.0}
Triggering via API Gateway
Congrats, we have a Lambda function! But we can only really interact with this function in the Lambda console and on our personal computer. What we really want is to be able to trigger this function from anywhere. So back in the browser, let’s scroll to the top of the calculate_mean function page, where we can see the triggers (and destinations) for our function.
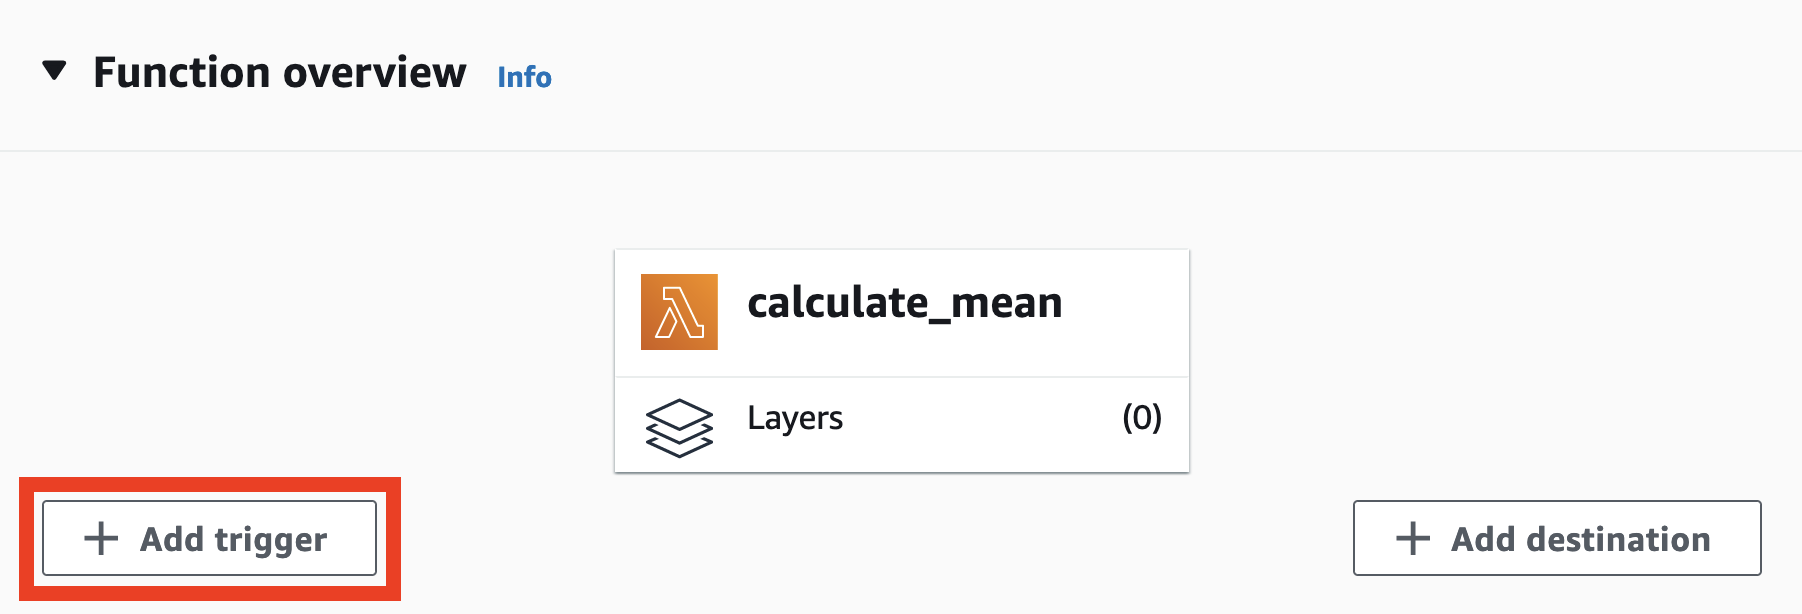
When we click Add trigger, we’re taken to a drop-down menu with an astonishing number of services, from Alexa, AWS IoT, and DynamoDB, to non-AWS services like Auth0, Datadog, and Shopify. We could have Auth0 trigger a Lambda function that writes to a database whenever a user logs in, for example, or Amazon SNS send us a notification any time a new file is uploaded to one of our S3 buckets.
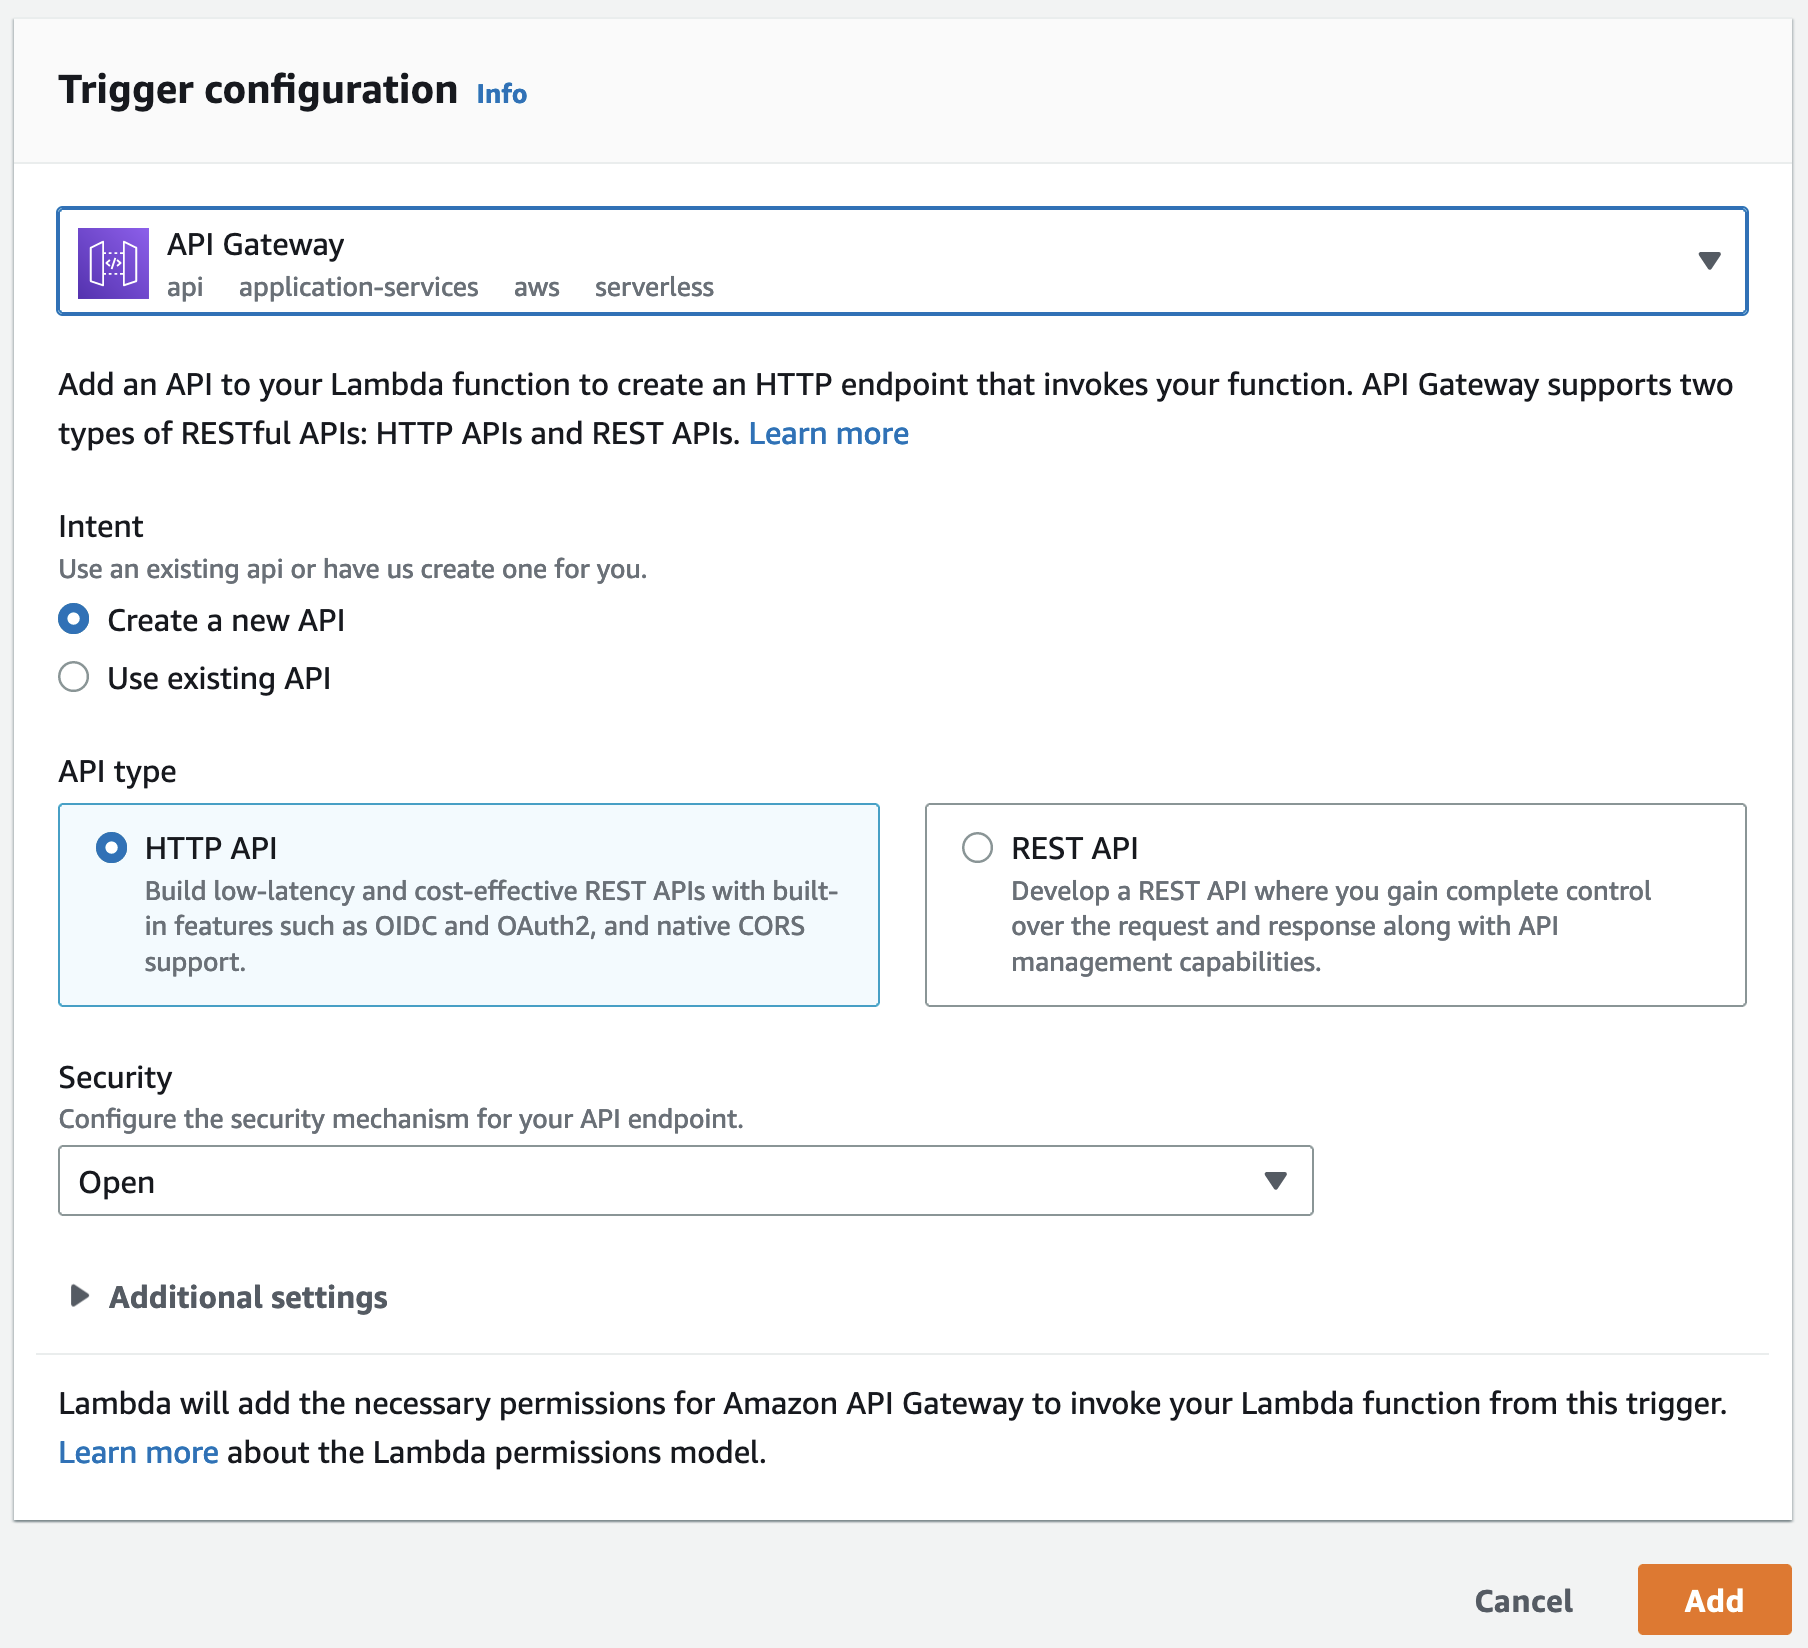
Let’s choose API Gateway to create an HTTP endpoint for our function. This will let us invoke our Lambda function from any code that can send an HTTP request. We’ll select Create a new API, HTTP API for API type, and Open for Security. Then click Add.
We should now see API Gateway as a trigger for our calculate_mean function. The endpoint should look something like https://xx.execute-api.us-east-1.amazonaws.com/default/calculate_mean.
If we click on the link, we’re taken to a page that just says “Internal Server Error.” This is because our Lambda function is configured to expect a JSON with the field nums, but our browser’s HTTP request doesn’t have this field. An easy way to pass in this field is as a query string parameter, where the URL itself has nums and the array of values. So instead of /default/calculate_mean, we would have something like /default/calculate_mean?nums=1,2,3.
So let’s modify our Lambda function to accept URL parameters. We’ll add a try-except block, where we first try pulling the nums param from the query string (event['queryStringParameters']). We convert the string to a list of strings, then cast each number to float. If the user passes in a JSON (as we did previously), we just pull the nums array from the event object.
| Python |
1
2
3
4
5
6
7
8
9
10
11
12
13
14
15
def lambda_handler(event, context):

    # For GET requests
    try:
        nums = event["queryStringParameters"]["nums"]
        nums = nums.split(",")
        nums = [float(x) for x in nums]
    # For JSON
    except:
        nums = event["nums"]

    return {
        'statusCode': 200,
        'body': sum(nums) / len(nums)
    }
Don’t forget to save the function and deploy it. Wait a few seconds, then copy your API endpoint into the URL address of a new tab on your browser. Add ?nums=1,2,3 to the end of the URL and hit enter.

Awesome! Let’s try one last thing. Open a Python window on your local machine (or your EC2, if you’re feeling fancy) and run the following:
| Python |
1
2
3
4
5
6
7
8
9
10
11
12
13
14
15
16
17
18
import requests

# Define variables
endpoint = "https://xxx.execute-api.us..." # replace with your URL
nums = [1.5, 2, 3.5]

# Cast list of numbers to string
nums_str = ','.join([str(x) for x in nums])

# Set the URL
url = f"{endpoint}?nums={nums_str}"

# Invoke the Lambda function through the API
response = requests.get(url)

# View the response
print(response.json())
# 2.3333333333333335
We see that we can even pass in floats via the URL string to our function, and that we’re able to access it from anywhere. Congrats! 🎉
Cleaning up
Our demos are over, so let’s make sure to delete everything we created to avoid incurring charges. We should start with our API endpoint, which is currently available for anyone on the internet to use – if someone guesses our URL, they could start sending hundreds or thousands of requests per second, which we’ll have to pay AWS for.
So let’s navigate to API Gateway in the AWS Console and delete our API endpoint. You click on the button next to calculate_mean-API, then Actions > Delete.
Next up is the Lambda function. Navigate to Lambda in the AWS Console and delete the function.
Finally, if you haven’t already, terminate your EC2 instance. Navigate to EC2 in the console, stop your instance if you haven’t already, and then terminate it. You can also go to your security group and remove your IP address from the inbound traffic rules.
Conclusions
In this post, we explored two Amazon Web Services for compute: EC2 and Lambda. We saw how Amazon EC2 lets us reserve a virtual server with whatever exact configuration we’d like, tailoring our resources to our use case. We created a server and SSH’d into it after modifying the read permissions of our private key. We then downloaded files from the internet, ran a Python script, and trained a classifier on some generated data.
We then contrasted EC2 with AWS Lambda, Amazon’s “server-less” approach to compute. We created a function for calculating the mean of an array of numbers and invoked the function from the console and AWS CLI. We then added an AWS API Gateway trigger, modified our function to take query string parameters, and called the function from our browser and local Python environment.
Between our intro, storage, and compute posts, we’ve used seven fundamental services: IAM, S3, RDS, DynamoDB, EC2, Lambda, and API Gateway. While Amazon offers over 200 services, many build on these core services. With the knowledge we’ve gained in this series, we’re well equipped to begin leveraging the cloud for our needs.
Thanks for reading!
Best,
Matt
Footnotes
1. Background
In researching for this post, I found plenty of interesting statistics about how expensive it can be for a popular website to be unresponsive or unavailable. Some of the more interesting stats:
- Taobao, a Chinese online shopping platform, had a 20-minute crash during Singles’ Day in 2021 that may have cost several billion dollars in sales.
- A webpage that loads within two seconds has an average bounce rate of 9%. That number jumps to 38% when the webpage takes five seconds to load.
2. Background
For hyper-growth early Amazon, the extra compute purchased during the holiday season would eventually just serve the normal business needs as the company grew. But for most companies, this extra compute would be a hindrance most of the year.
As a side note, there’s a common narrative that AWS spun out of Amazon trying to utilize all this “extra compute” sitting around Q1-Q3. They had all these unused servers, so why not just let customers use them? My favorite rebuttal of this narrative is that when Q4 came up the following year, Amazon obviously couldn’t just terminate all those customers to take back their servers! Amazon would be stuck needing to buy a bunch more servers again.
3. Creating a function
We can argue whether error handling should be within the Lambda function or at callers to the function. There are tradeoffs: adding error handling to the function means the checks are in one place, reducing mental load on developers interacting with the function. But checks make the function heavier – they need to run every time the function is called.
We can keep the function lightweight by having callers guarantee valid inputs. But enforcing this responsibility is challenging, especially if the codebase is large and developers don’t necessarily have the full context of the system. This also means there’s no standardization on what checks are run and how errors are communicated back to the user.
One intermediate option could be to have checks performed by one Lambda function that then passes valid inputs to the actual function. This increases the overall system complexity, but it allows for both reduced mental load on callers and a lightweight function. Ultimately, the right approach depends on your use case.